
iPhone: 10 temppua parempien valokuvien saamiseksi
Oikeiden temppujen avulla voit ottaa ensiluokkaisia valokuvia myös iPhone-kameralla. Näytämme sinulle kuinka.
1. Parempien iPhone-valokuvien temppu: Puhdista kameran linssi
Se voi kuulostaa banaaliselta, mutta epäpuhdas linssi on usein syy siihen, että valokuvien tulokset eivät ole optimaaliset.
- Usein ei ole heti selvää, että epäterävät kuvat johtuvat likaisesta kameran linssistä.
- Puhdista iPhonen linssi säännöllisesti mikrokuitukankaalla, jotta laatu ei heikkene.

2. Temppu parempien iPhone-valokuvien saamiseksi: älä käytä zoomia
Parhaan kuvanlaadun saavuttamiseksi sinun tulee välttää iPhone-kameran zoomaustoiminnon käyttöä.
- Kuvanlaatu laskee huomattavasti iPhonen zoomin alapuolelle, valokuvat näyttävät pikselöityinä ja vähemmän yksityiskohtaisina.
- Tämä johtuu siitä, että iPhone käyttää digitaalista zoomia. Kuvaosa on vain rajattu ja suurennettu, eikä sitä, kuten optisen zoomin tapaan, säätää objektiivin mekaanisilla asetuksilla.
3. Temppu parempiin iPhone-valokuviin: lähikuvat
IPhone-kamerasi todella tulee omaan, kun otat valokuvia pienestä etäisyydestä.
- Digitaalisen zoomin sijaan sinun tulisi ottaa lähikuvia esineistä.
- Tämän lisäksi ylläpidetään optimaalista kuvan laatua, ja voit myös luoda tyylikkään terävyystehosteen keskittymällä kohteeseen.
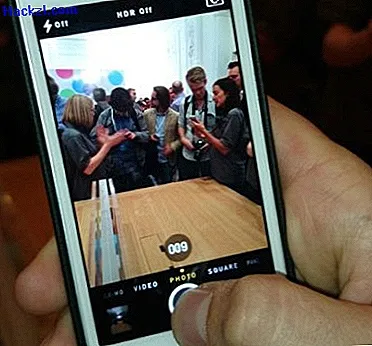
4. Temppu parempien iPhone-valokuvien saamiseksi: käytä HDR-tilaa
IPhone-kameran HDR-tila voi parantaa näkyvästi valokuvien tuloksia.
- Jos aktivoit HDR-tilan kamerasovelluksessa, iPhone ottaa kolme kuvaa erilaisilla valotuksilla ja yhdistää ne optimaalisiin valaistusolosuhteisiin.
- HDR-tila on erityisen sopiva valokuviin vaikeissa valaistusolosuhteissa, kuten silloin, kun valokuvattavan kohteen valaistus poikkeaa suuresti ympäristön valaistuksesta.
- Jos et halua päättää, milloin HDR-tila kannattaa, voit asettaa sen automaattiseksi. IPhonesi analysoi siten kuvaosan ja aktivoi HDR-toiminnon, jos valaistusolosuhteiden mukaan voidaan odottaa parempaa tulosta.

5. Parempien iPhone-valokuvien temppu: jatkuva kuvaus
Sarjakuvatoiminnon avulla voit ottaa optimaalisesti liikkuvia kohteita.
- Voit tehdä tämän pitämällä laukaisinta painettuna näytöllä. Laite ottaa nyt useita kuvia sekunnissa, joista voit valita parhaan tuloksen.
6. Temppu parempien iPhone-valokuvien saamiseksi: zoom-toiminto tarkentamiseksi
IPhonen digitaalinen zoom ei sovellu korkealaatuisten kuvien ottamiseen kaukaisista tilanteista, mutta voit käyttää zoomia tarkentamaan haluttua kuvaosaa tarkemmin.
- Tätä varten zoomataan asiaan kuuluvaa kohdetta niin, että se täyttää kuvaosan, ja tarkenna se napauttamalla näyttöä. Loitonna sitten uudelleen ja paina laukaisinta.
7. Parempien iPhone-valokuvien temppu: säädä valotusta manuaalisesti
Et voi hallita ISO-arvoa ja valotusaikaa erikseen iPhonen kamerasovelluksessa, mutta valotus on mahdollista asettaa manuaalisesti.
- Napsauta näyttöä ikään kuin keskittyisit tarkennukseen ja pyyhkäise sitten ylöspäin kohteen vaaleamiseksi tai alaspäin tummentaaksesi kohdetta.
8. Temppu parempien iPhone-valokuvien saamiseksi: automaattitarkennus ja automaattinen valotuksen lukitus
IPhonesi asettaa valotuksen ja tarkennuksen automaattisesti.
$config[ads_text5] not found- Jos haluat estää valotuksen ja tarkennuksen säätämisen manuaalisten asetusten vastaisesti, voit aktivoida automaattitarkennuksen ja automaattisen valotuksen lukituksen pitämällä näyttöä painettuna.
9. Temppu parempien iPhone-valokuvien saamiseksi: Käytä äänenvoimakkuuspainikkeita tai EarPod-laitteita liipaisimina
Kosketusnäytön liipaisimen käytön sijasta voit käyttää myös iPhonen äänenvoimakkuuspainikkeita tai liitettyjen Apple EarPod -kuulokkeiden ohjauspainikkeita.
- Toiminto voi auttaa estämään liikettä laukaistaessa ja siten epäteräviä valokuvia.
10. Temppu parempiin iPhone-valokuviin: käytä jalustaa
Käytä kolmijalkaa optimaalisen vakauden saavuttamiseen kuvattaessa.
- Voit kiinnittää iPhonen mihin tahansa klassiseen jalustaan asennussovittimen avulla.
- Vaihtoehtoisesti, laitteessa on erityisiä iPhone-jalustaa, joissa on integroitu pidike.
